Let’s create an ASP.NET Core 8 app to use Active Directory Federation Services for authentication and authorization. The .NET code will use OAuth 2.0 and OpenID Connect to communicate with ADFS, and we’ll create an ADFS application group for the configuration.
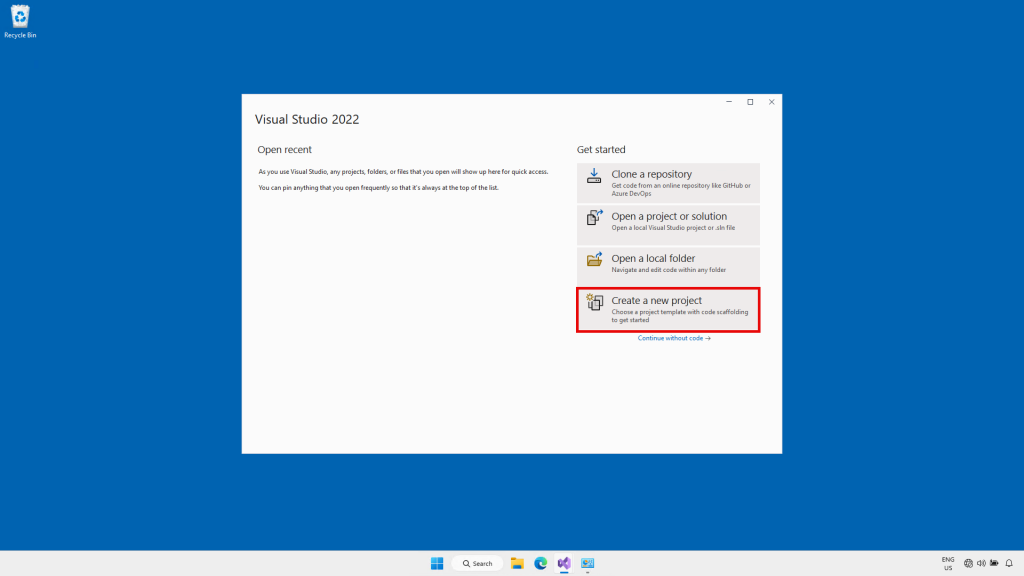
Start by opening up Visual Studio 2022 and creating a new project. You can use the free community edition to do this.
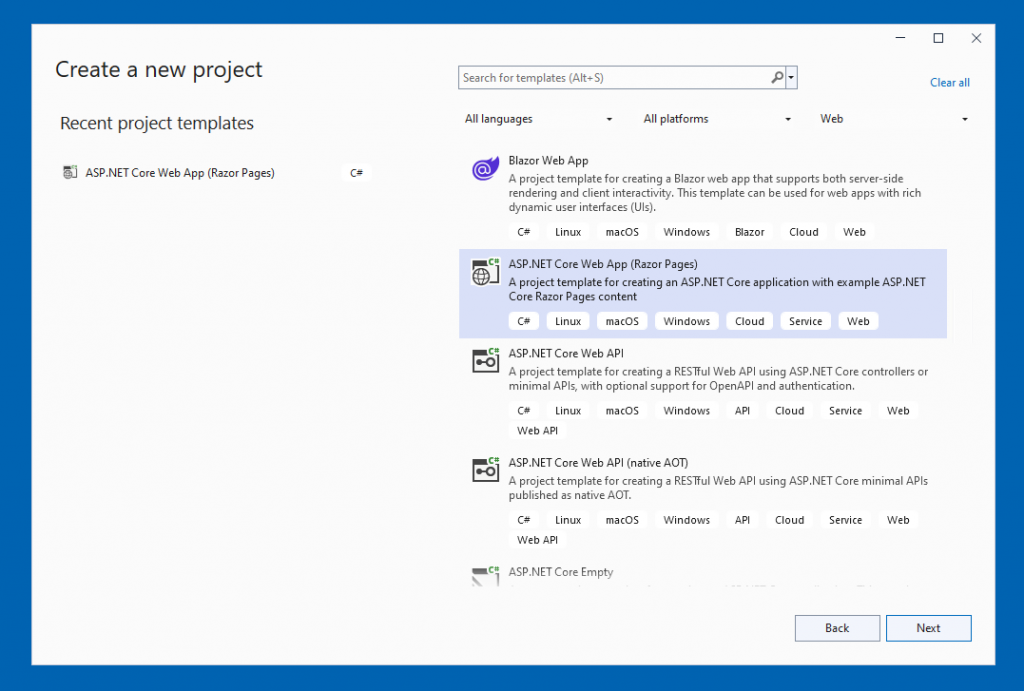
For the project type, choose ASP.NET Core Web App (Razor Pages)
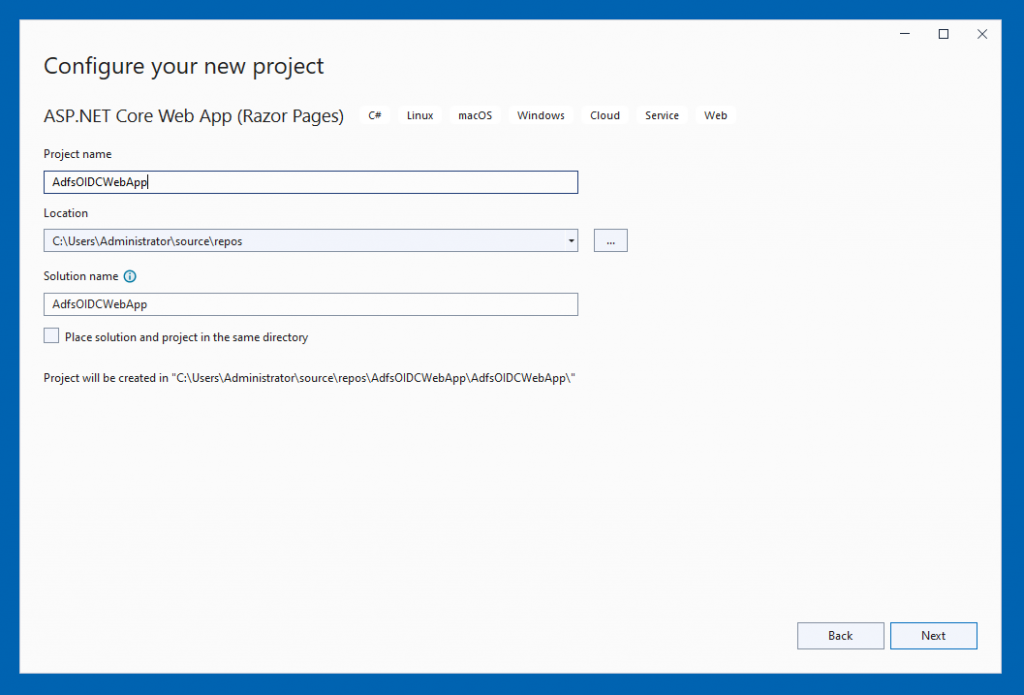
Give your project a name
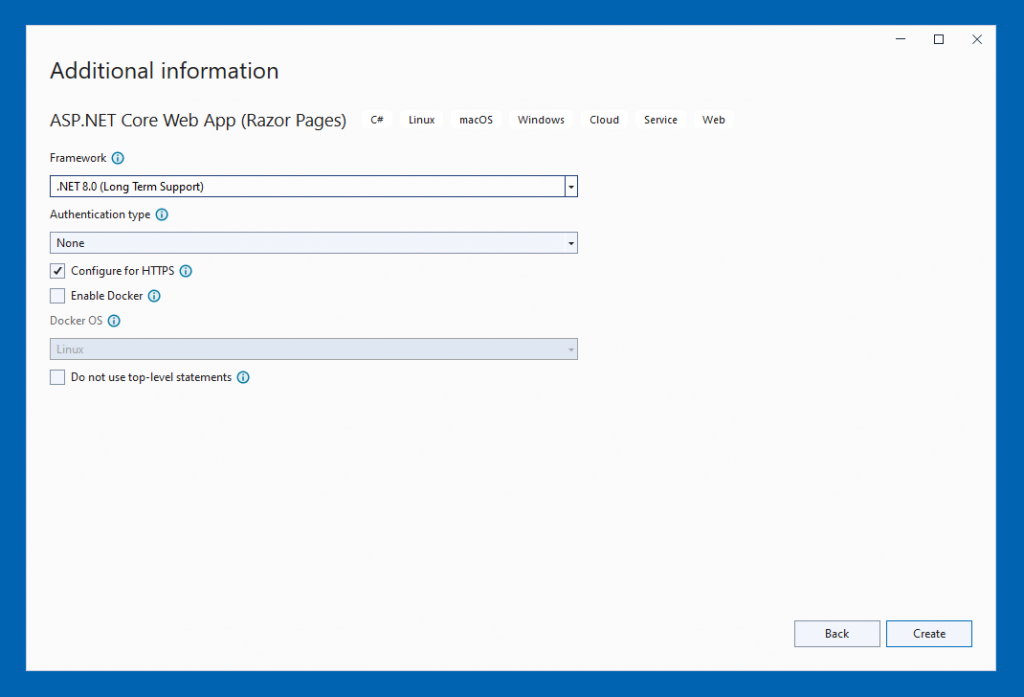
On the Additional Information screen, leave the Framework as .NET 8.0. And leave the Authentication type as “None”. We’re going to add the NuGet package for OpenId Connect after the project is created. Click the “Create” button at the bottom right of the screen to create the project.
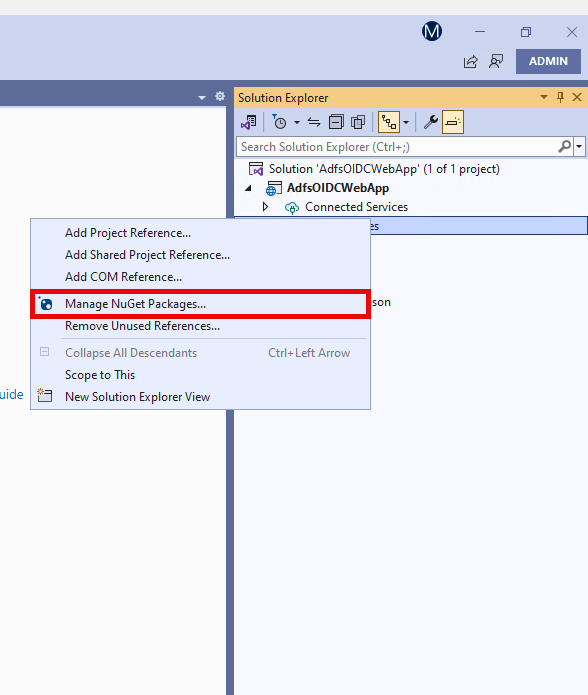
When the project opens, go to Solution Explorer and right click on “Dependencies”

Click “Manage NuGet Packages”
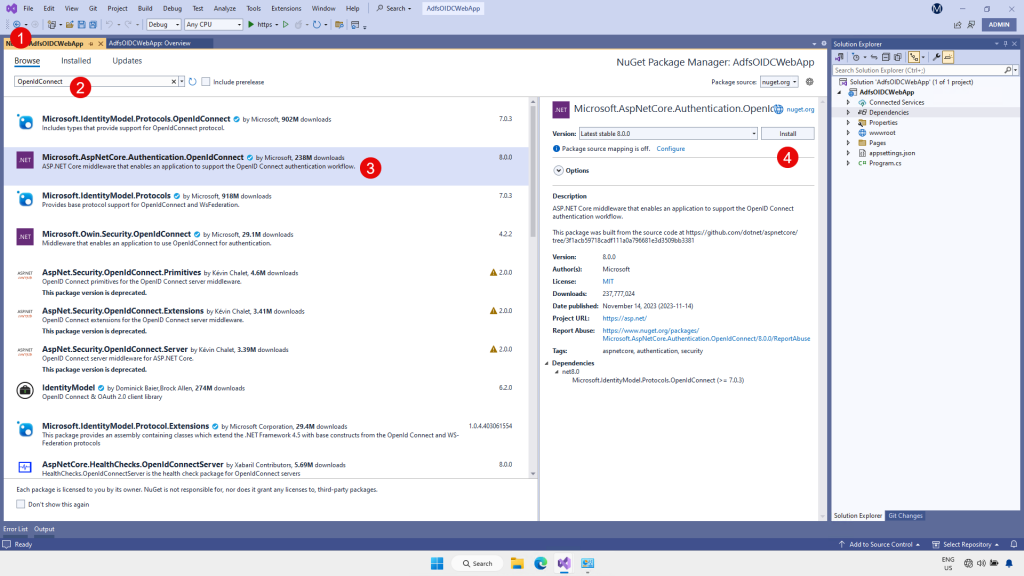
When the NuGet Package Manager console opens, click the “Browse” tab. Search for OpenIdConnect. In the results list, click on “Microsoft.AspNetCore.Authentication.OpenIdConnect”. In the window to the right, click “Install”
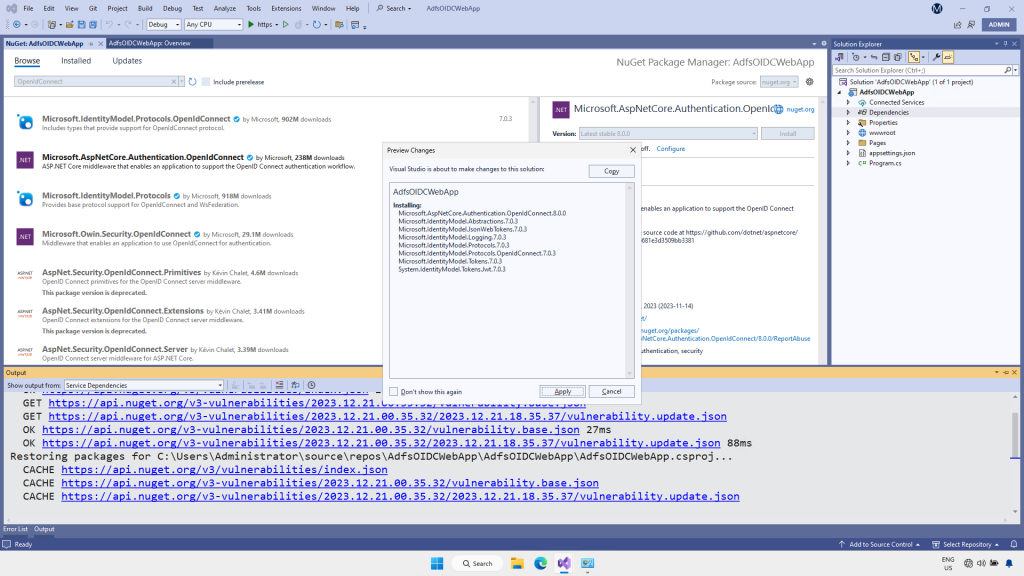
In the popup dialog boxes, Apply the Changes and Accept the License Terms
In Solution Explorer, double click on the Program.cs file to open it for editing
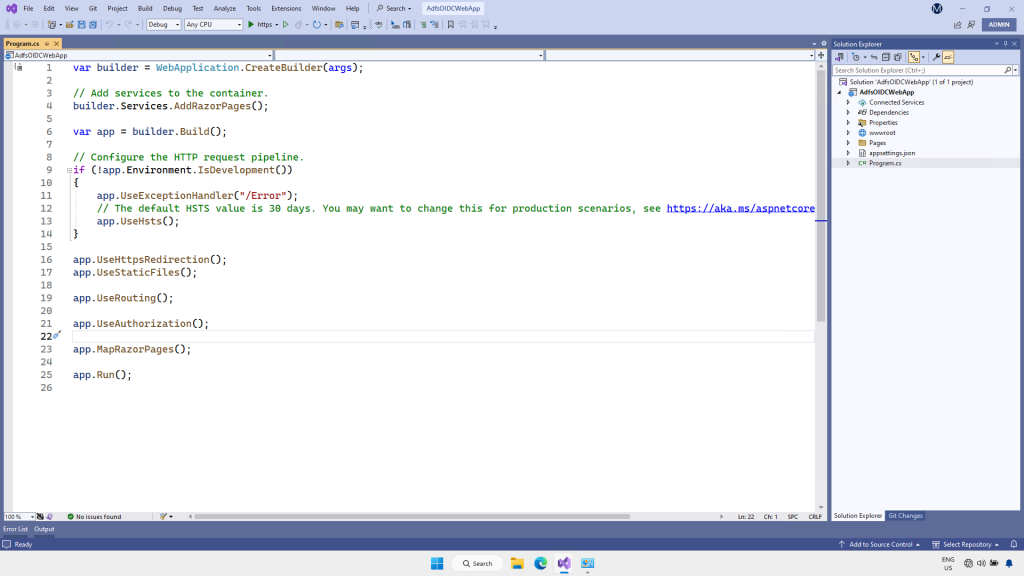
Add the following code, after Line 4 “builder.Services.AddRazorPages()”
And before Line 6 “var app = builder.Build();”
builder.Services.AddAuthentication(options =>
    {
        options.DefaultScheme = CookieAuthenticationDefaults.AuthenticationScheme;
        options.DefaultChallengeScheme = OpenIdConnectDefaults.AuthenticationScheme;
    })
    .AddCookie()
    .AddOpenIdConnect(options =>
    {
        options.MetadataAddress = "https://<your ADFS server URL>/adfs/.well-known/openid-configuration";
        options.ClientId = "";

        options.ResponseType = OpenIdConnectResponseType.Code;

        options.Scope.Clear();
        options.Scope.Add("openid");

    });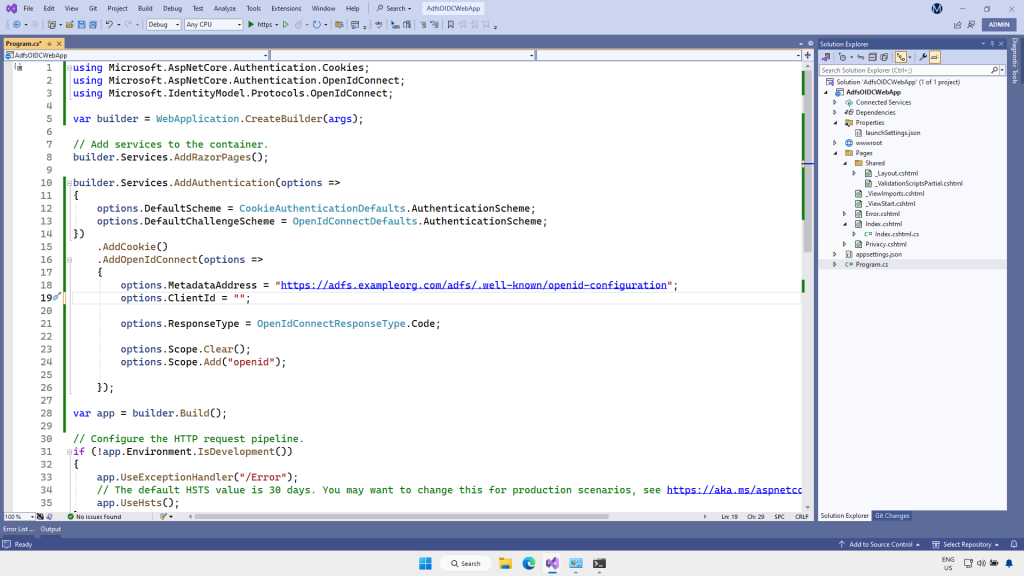
In the AddAuthentication block, we’re setting the default authentication method to check if there’s an authentication cookie being presented by the browser from a previous authentication to ADFS. If there isn’t, we’re going to challenge the browser to authenticate the user by using the OpenIdConnect configuration that will be set farther down.
builder.Services.AddAuthentication(options =>
    {
        options.DefaultScheme = CookieAuthenticationDefaults.AuthenticationScheme;
        options.DefaultChallengeScheme = OpenIdConnectDefaults.AuthenticationScheme;
    })
    .AddCookie()
In the .AddOpenIdConnect configuration block, you need to update the options.MetadataAddress value. Replace the placeholder <your ADFS server URL> with the address of your ADFS server. The path to the OpenIdConnect configuration endpoint appended onto the ADFS server address will be the same for everyone.
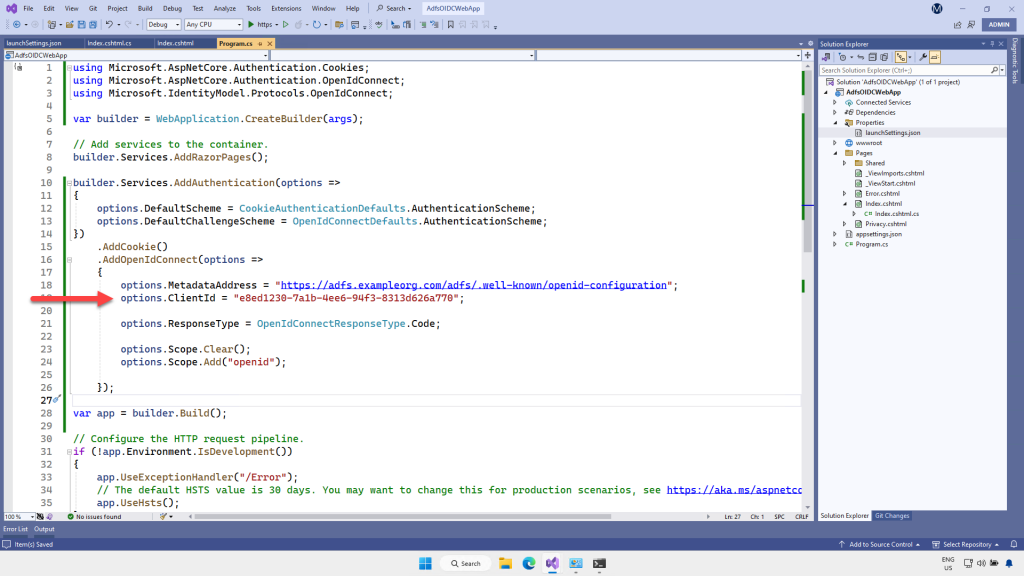
The ClientId will come from the Application Group configuration we’re going to do later in this tutorial.
The ResponseType is set to OpenIdConnectResponseType.Code which means we want an authorization code returned from ADFS. The ASP.NET OpenIdConnect middleware will use that code to get an access token. Next we need to specify scopes, to tell ADFS that we’re using the openid connect protocol. This scope will need to be configured on the ADFS side as well, which it is by default.
    .AddOpenIdConnect(options =>
    {
        options.MetadataAddress = "https://<your ADFS server URL>/adfs/.well-known/openid-configuration";
        options.ClientId = "";

        options.ResponseType = OpenIdConnectResponseType.Code;

        options.Scope.Clear();
        options.Scope.Add("openid");

    });
There are many more configuration options available for OpenIdConnect, and I’ll cover them in a future post.
Farther down in Program.cs, add the following code immediately before app.UseAuthorization();
app.UseAuthentication();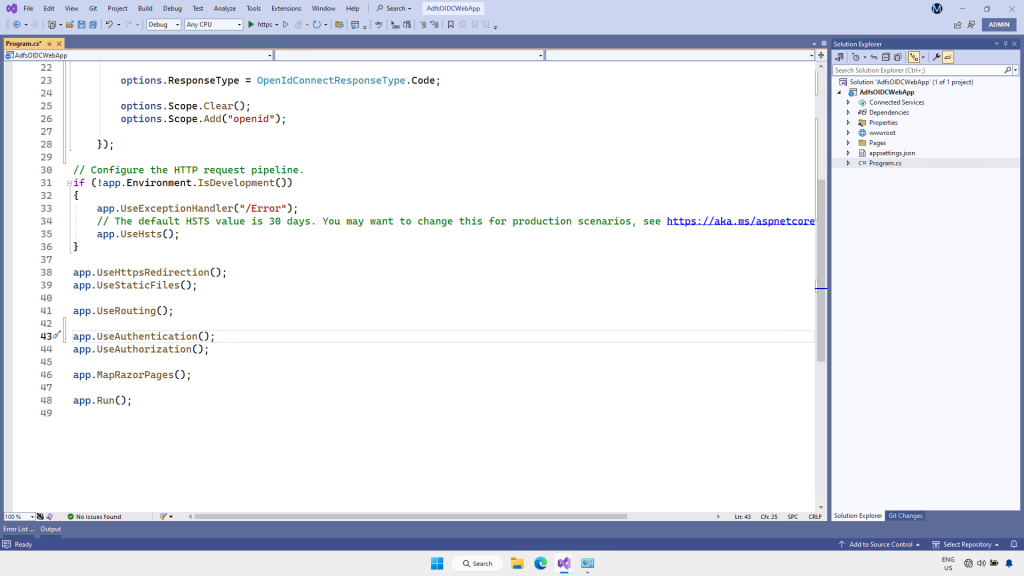
Now let’s configure the home page of the application to display the claims returned from ADFS.
Open up Index.cshtml and replace the default code with the following Razor pages code. This code will loop through the claims returned from ADFS and display them on the screen
@page
@using Microsoft.AspNetCore.Authentication
@model IndexModel

@{
    ViewData["Title"] = "Home Page";
}

<h2>Claims Returned</h2>
<table id="claims">
    <tr>
        <th>Claim Type</th>
        <th>Claim Value</th>
    </tr>

    @foreach (var claim in User.Claims)
    {
        <tr>
            <td>@claim.Type</td>
            <td>@claim.Value</td>
        </tr>
    }
</table>

<h2>Authentication Properties</h2>

<dl>
    @foreach (var prop in (await HttpContext.AuthenticateAsync()).Properties.Items)
    {
        <dt>@prop.Key</dt>
        <dd>@prop.Value</dd>
    }
</dl>
Open up the code behind file Index.cshtml.cs and add the [Authorize] attribute to the class. This will require that the user be authenticated in order to access the page. If they are not, then ASP.NET will check the configuration in Program.cs to force an authentication.
You may also need to add a using statement at the top for Microsoft.AspNetCore.Authorization
using Microsoft.AspNetCore.Authorization;
using Microsoft.AspNetCore.Mvc;
using Microsoft.AspNetCore.Mvc.RazorPages;

namespace AdfsOIDCWebApp.Pages
{
    [Authorize]
    public class IndexModel : PageModel
    {
        private readonly ILogger<IndexModel> _logger;

        public IndexModel(ILogger<IndexModel> logger)
        {
            _logger = logger;
        }

        public void OnGet()
        {

        }
    }
}
Finally, we’ll need to add some css to display these claims. Open up Layout.cshtml (under the Pages/Shared folder) and add the following css inside the <head> tag. It should go after the last <Link> tag, and before </head>
    <style>
        #claims {
            font-family: "Trebuchet MS", Arial, Helvetica, sans-serif;
            border-collapse: collapse;
            width: 100%;
        }

            #claims td, #claims th {
                border: 1px solid #ddd;
                padding: 8px;
            }

            #claims tr:nth-child(even) {
                background-color: #f2f2f2;
            }

            #claims tr:hover {
                background-color: #ddd;
            }

            #claims th {
                padding-top: 12px;
                padding-bottom: 12px;
                text-align: left;
                background-color: #4CAF50;
                color: white;
            }
    </style>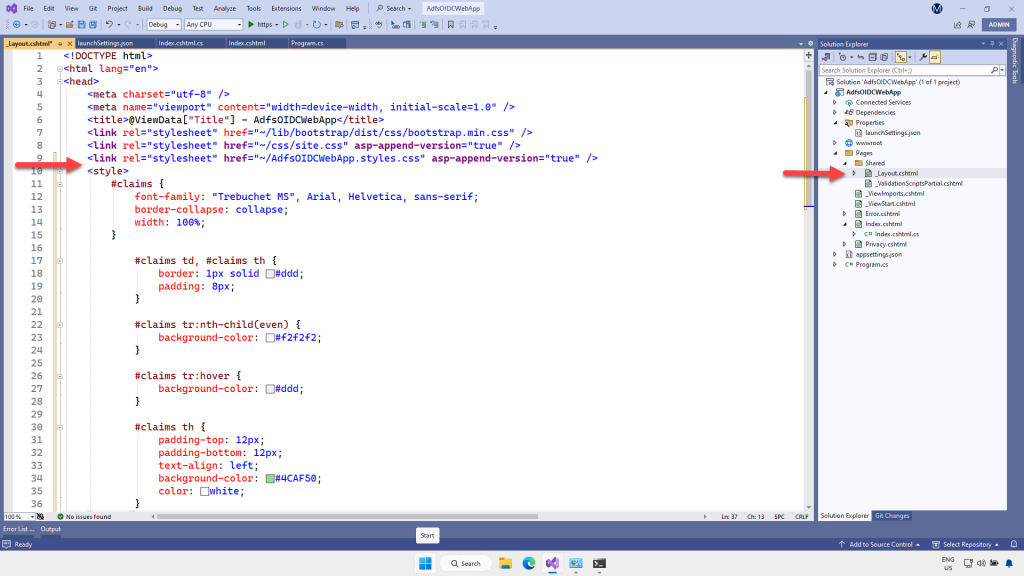
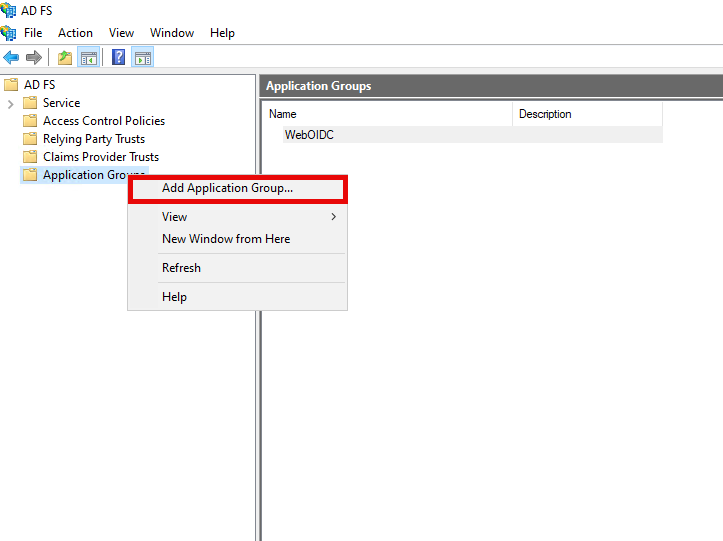
Now we’re ready to configure the Application Group in ADFS.
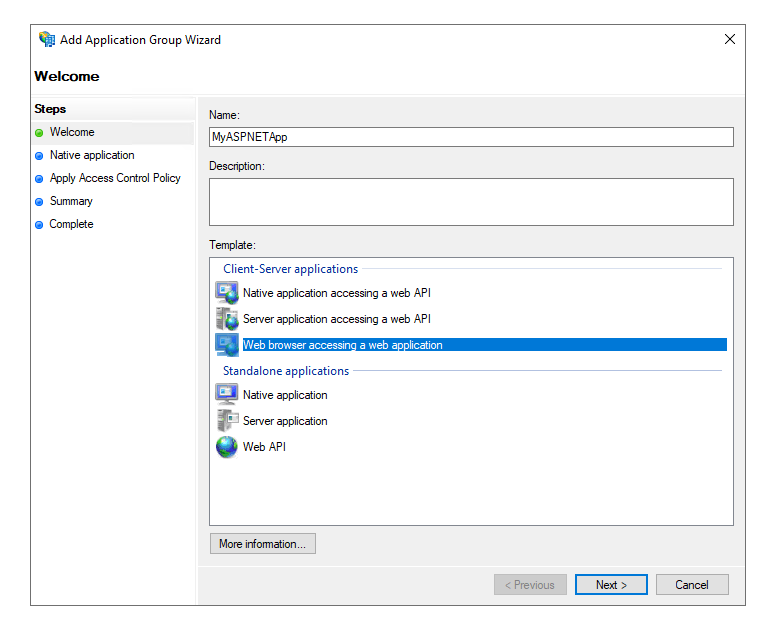
Open up the ADFS console on the ADFS server, and right click on the Application Group node. Select “Add Application Group”
In the wizard that opens, enter a name for the Application Group. Select “Web browser accessing a web application” as the template, and click Next
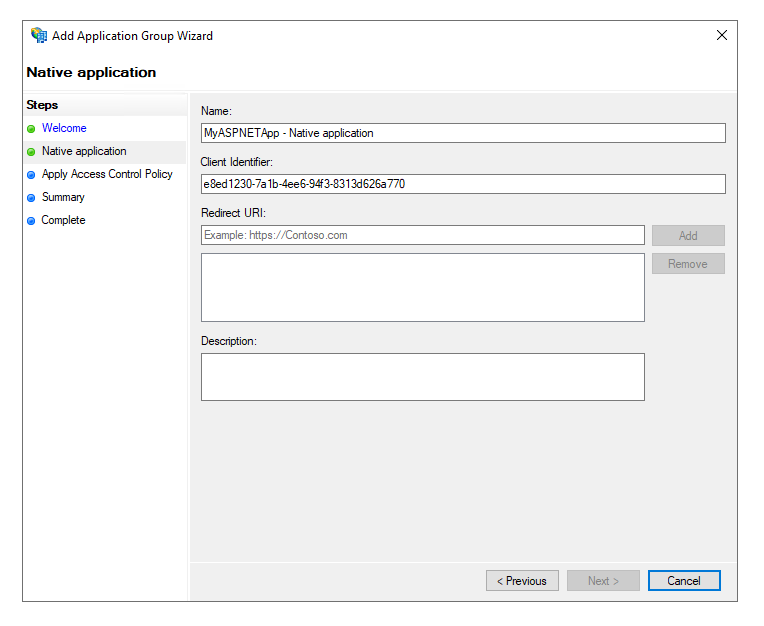
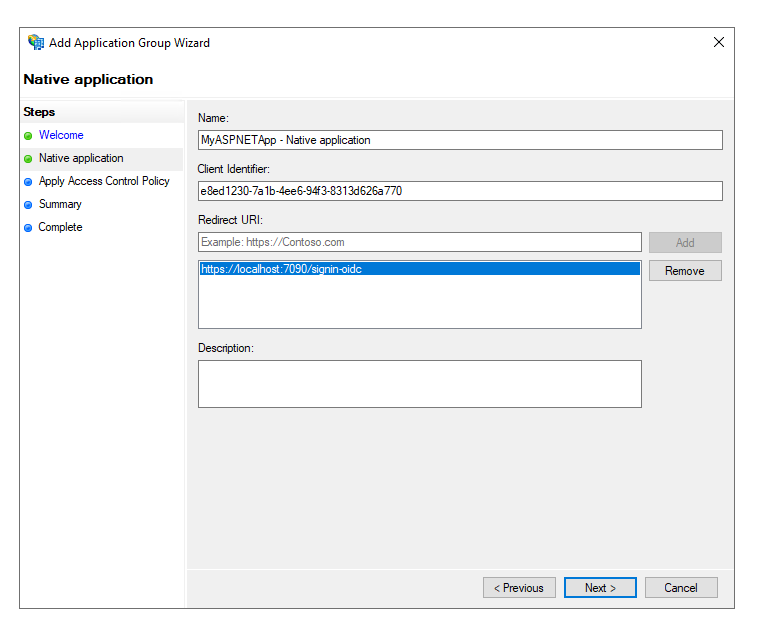
On the next screen, copy the Client Identifier GUID. We will need to paste this into the configuration section of the ASP.NET Core web application. The Redirect URI needs to be the URI that will be calling ADFS for authentication. We’ll get that from Visual Studio.
Back in Visual Studio, open Program.cs and paste the client id into the placeholder we inserted earlier
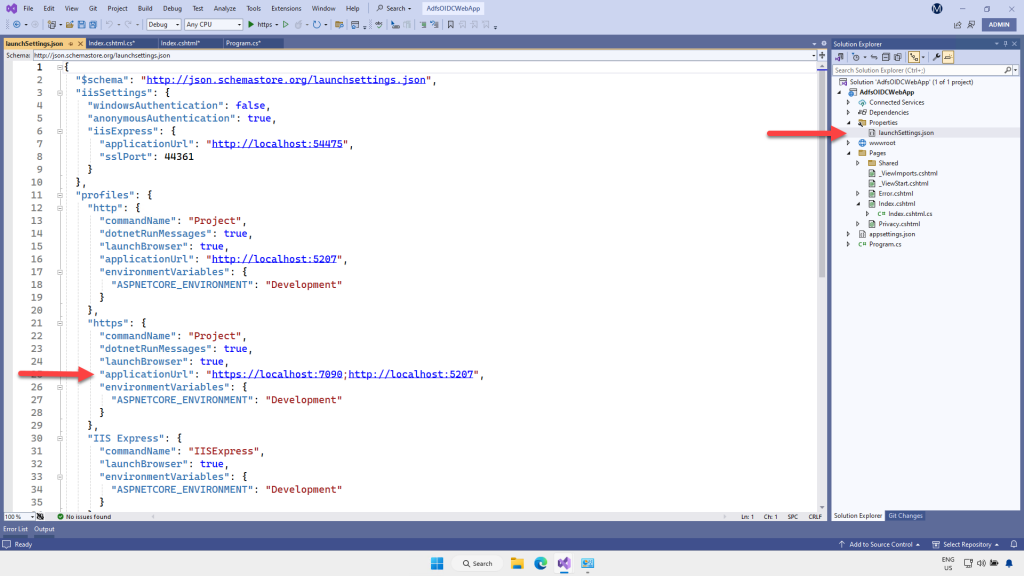
Next, we’re going to get the redirect URI needed for ADFS. This is the address the browser will open to when we test the application. You can get that in Solution Explorer, by expanding the Properties folder and opening the file launchSettings.json.
The URL we need is in the HTTPS node. Copy the first “applicationUrl” property. In this example it is https://locathost:7090, but the port number will probably be different in your case
Go back to the ADFS console on the ADFS server, and paste in the redirect URI copied from Visual Studio. You need to append the path “/signin-oidc”. Note that this is not an actual folder or file you need to add to your Visual Studio project. This is just a convention of the .NET OpenId Connect middleware. Click Add to add the URI to the list.
When you decide to deploy your application, you’ll probably create a seperate Application Group for that configuration, so you can specify a different Access Control Policy, for example. But it’s also possible to just add another Redirect URI to this list, so this Application Group could be called from different deployed instances of your application and still redirect to the correct caller
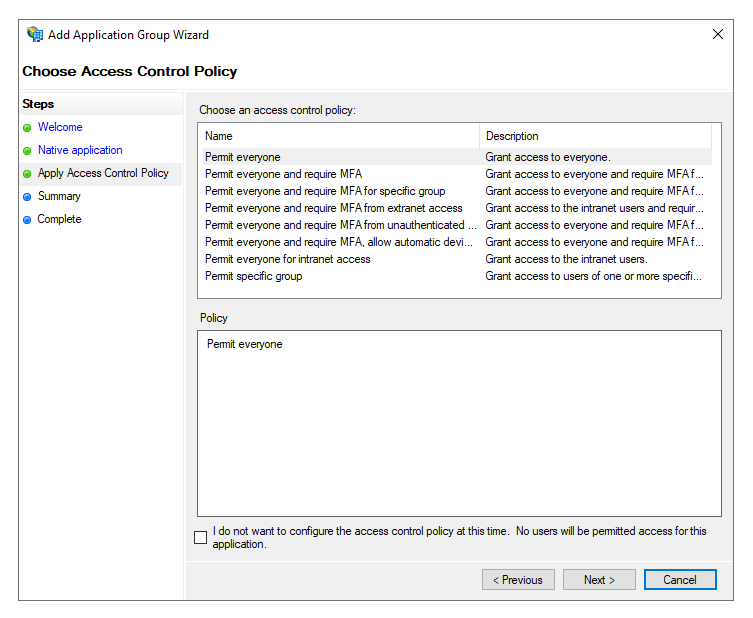
Click next. Here you can choose the Access Control Policy. For simplicity, we’ll just select the policy to “Permit everyone”. This will only allow authenticated users
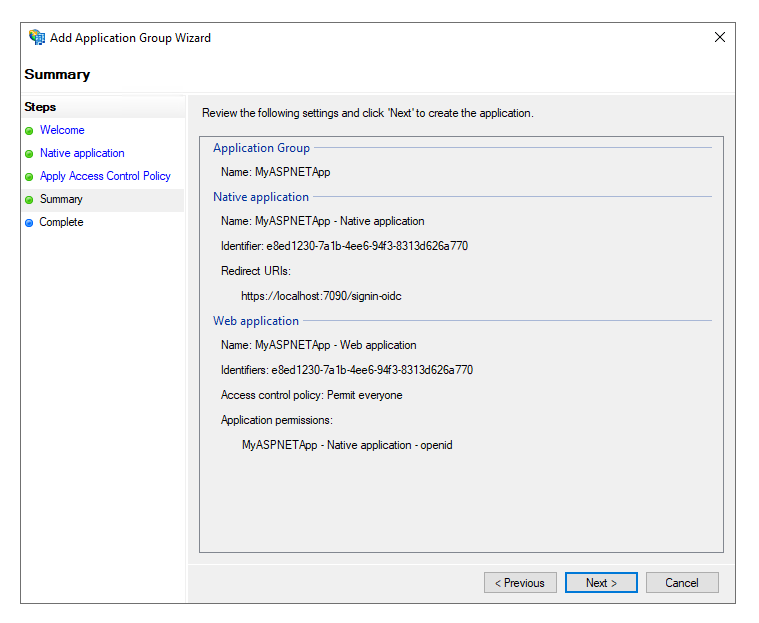
Click next to review the Summary for the Application Group, and then click Next to create the Application Group. Then you can close the wizard
Now there’s an Application Group

You can further configure the Application Group by double clicking on it.
The Native Application is the front end configuration, which contains the Client Id and Redirect URI.
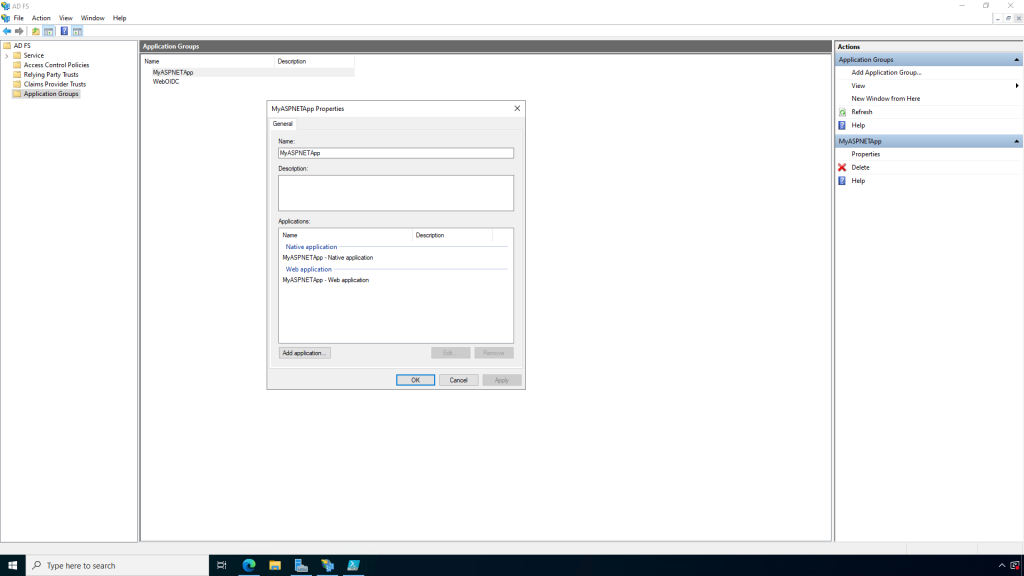
The Web Application configuration is where you can modify the Access Control Policy (e.g. to add MFA), Issuance Transform Rules (to specify the claims you would like returned to the calling application), and the Client Permissions (OAuth 2.0 Scopes).
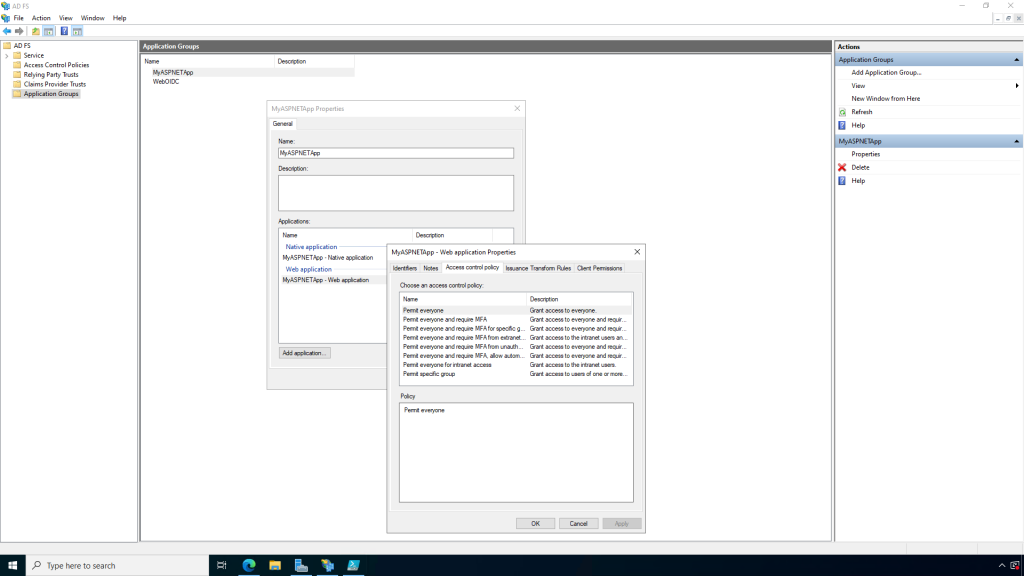
We won’t do any more configuration in this tutorial though. Close these dialog boxes and return to Visual Studio.
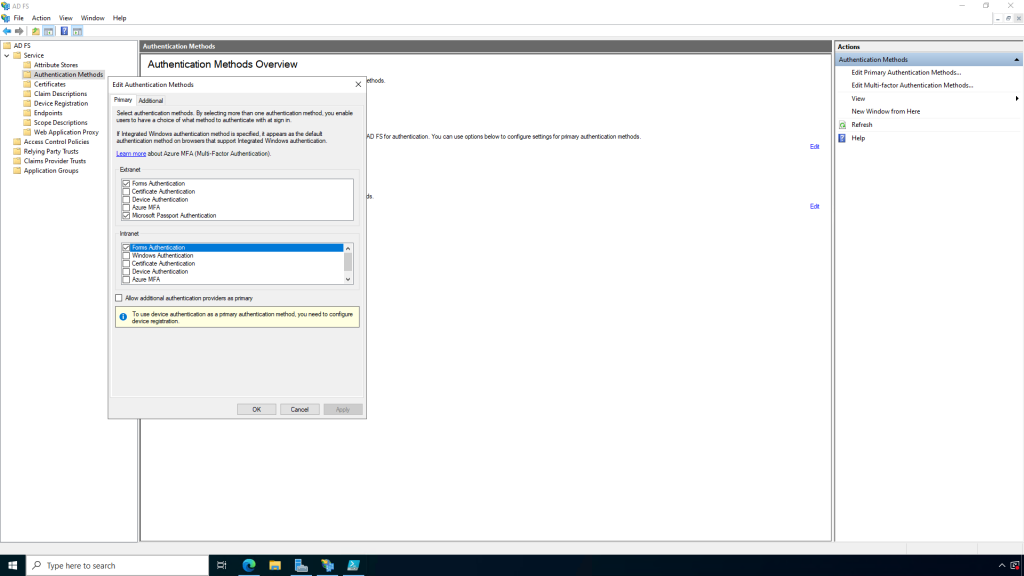
Run the app in Visual Studio. The browser will open to the localhost address, then be redirected to ADFS. Depending on how you’ve configured Primary Authentication in ADFS, the user will need to authenticate. In this example, I’ve configured Forms Authentication in ADFS for logins from the Intranet
So the user is redirected to the ADFS login page
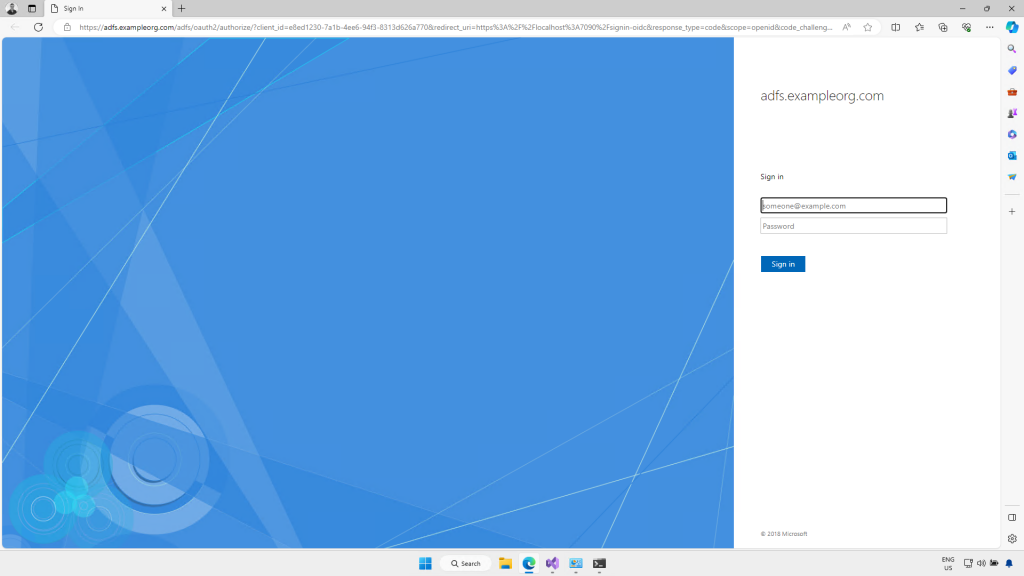
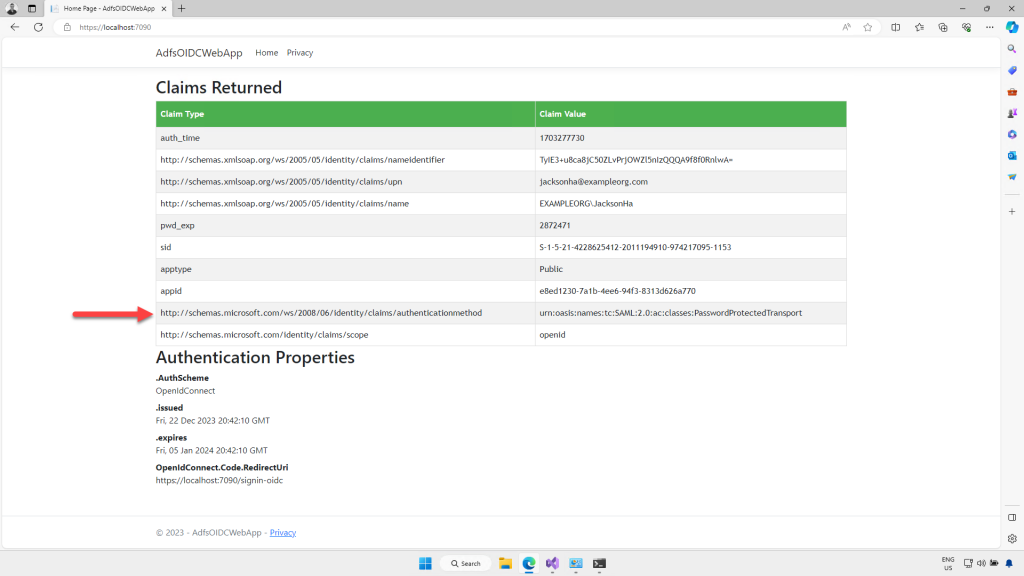
I enter the user’s credentials, and click “Sign in”. And the browser is redirected back to the home page of the application, where the code we added displays the claims returned from ADFS.
Notice the value of the claim “http://schemas.microsoft.com/ws/2008/06/identity/claims/authenticationmethod”.
It’s set to “urn:oasis:names:tc:SAML:2.0:ac:classes:PasswordProtectedTransport”. Which tells us that the user was authenticated using Forms Based Authentication. So claims not only return information about the user from Active Directory, they also contain information about the login itself
In a future tutorial, I’ll show you how to customize the claims returned from ADFS and use them in your .NET code.
I hope this helped! You can check out my courses on ADFS and other topics on Pluralsight. Sign up for a free trial using the link below.
