In my Pluralsight course “Implementing Windows Server 2016 Identity Federation and Access“, I use a sample application as a relying party that leverages ADFS for it’s authentication. This post will describe how to create and configure that ASP.NET MVC application within Visual Studio, and configure the corresponding Relying Party Trust in ADFS 2016. In a future post I will show how to deploy the application to an IIS server.
First, on your development computer running Visual Studio, make sure you can reach the XML metadata endpoint for the ADFS server on your network. This could be a lab network of virtual machines, or your organization’s actual network.
The path to the ADFS XML metadata is always “your ADFS server FQDN”, followed by a path to the FederationMetadata XML document, which for ADFS 2016 is “/FederationMetadata/2007-06/FederationMetadata.xml”
e.g. https://youradfsservername/FederationMetadata/2007-06/FederationMetadata.xml
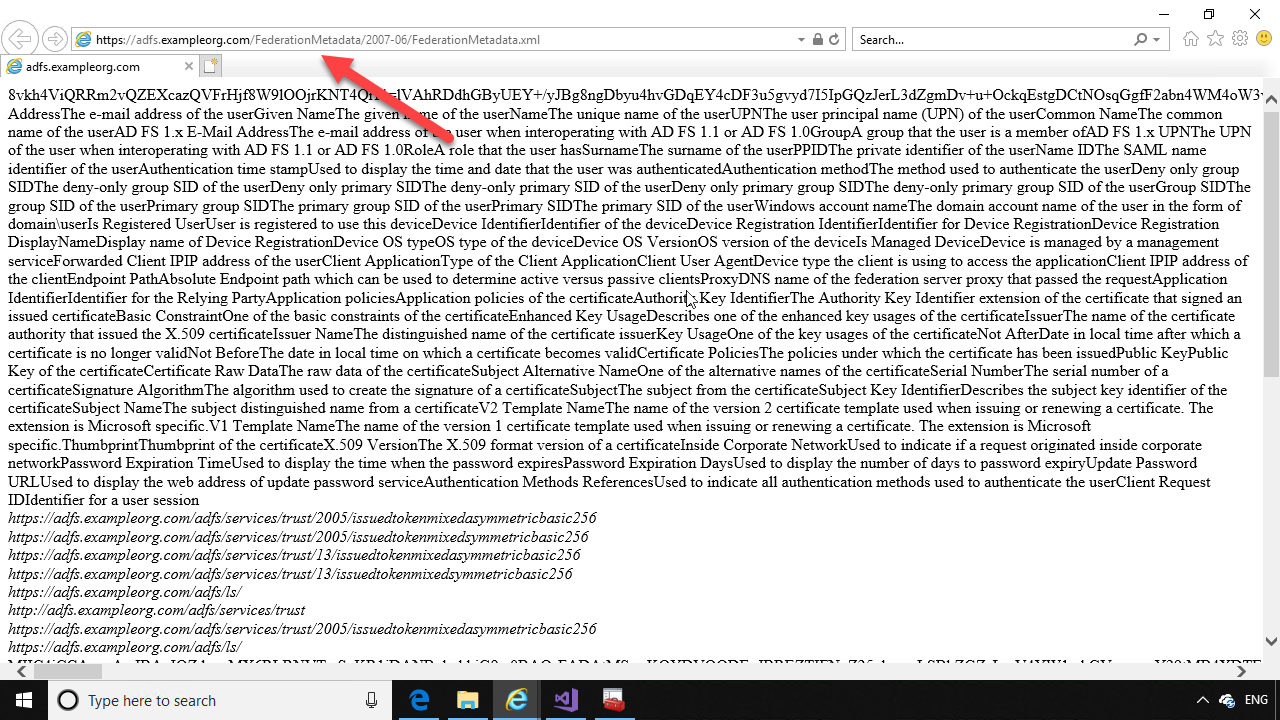
If you can reach the ADFS server in your browser, then you are ready to configure an ASP.NET application to use ADFS for authentication.
Open Visual Studio, and select “File -> New Project”.
In the dialog that opens, select the “ASP.NET Web Application (.NET Framework)” template, under the Web node.
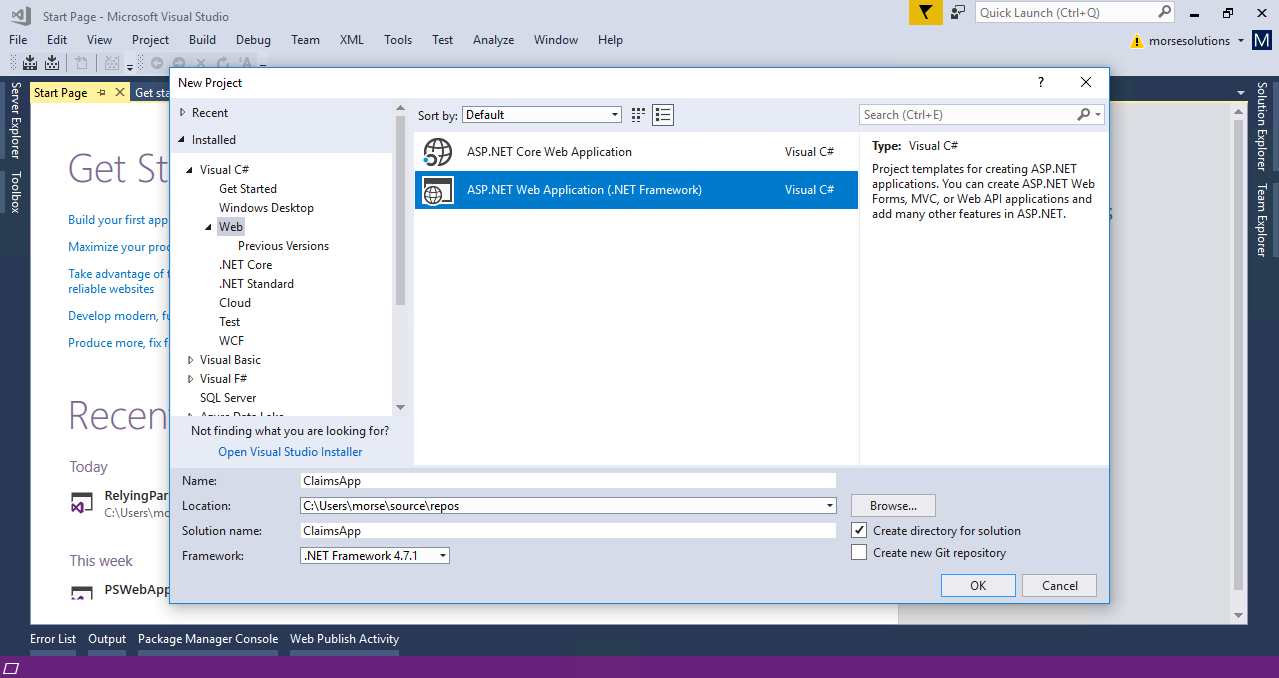
Name the project “ClaimsApp” (or whatever you choose).
Click OK. On the next page of the New Project wizard, select “MVC” for the project type, and click the button labeled “Change Authentication”.
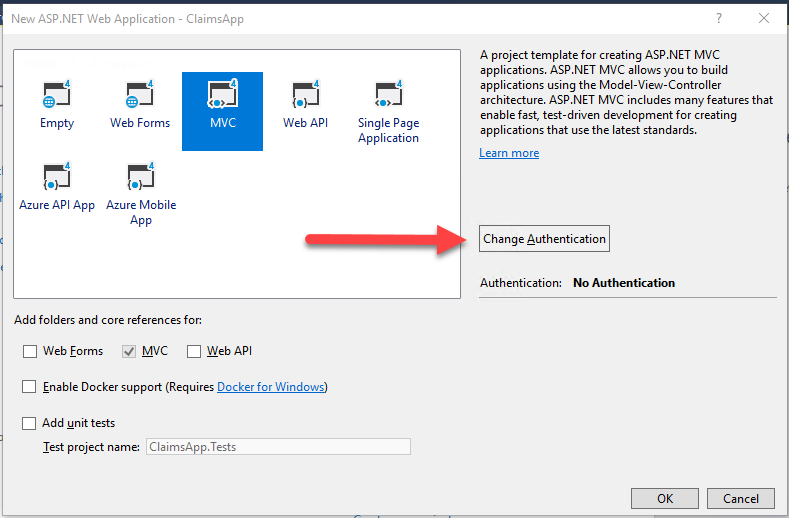
In the dialog that opens, choose the radio button: “Work or School Accounts” on the left. Then select “On-Premises” from the drop-down list. This enables the text box to add the endpoint to your ADFS FederationMetadata XML document – the same one you opened in your browser earlier. Enter the URL to FederationMetadata.xml in the “On-Premises Authority” text box.
In the “App ID URI” text box, enter a unique identifier for your application in the form of a URI. Note that this does not need to be the actual URL to your relying party application, this is just a unique identifier that gets passed in the URL to ADFS, so that ADFS will know which relying party application is calling.

Click “OK” and “OK” again to create the new ASP.NET Web Application.
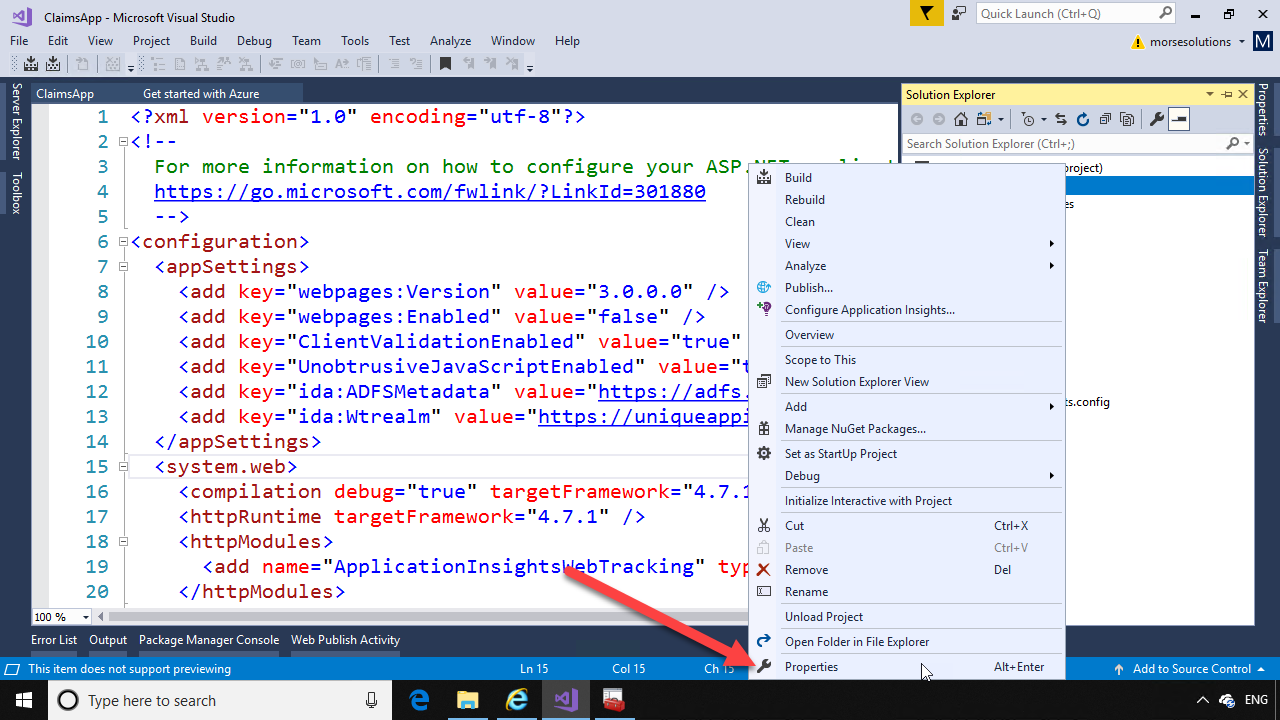
When the application is created, open Solution Explorer and look at the web.config file. Notice under <appSettings>, the key “ida:ADFSMetadata” contains the URL to the FederationMetadata.xml file, and “ida:Wtrealm” contains the unique identifier you entered. Make note of this unique identifier, as you will need it when configuring the relying party in ADFS.

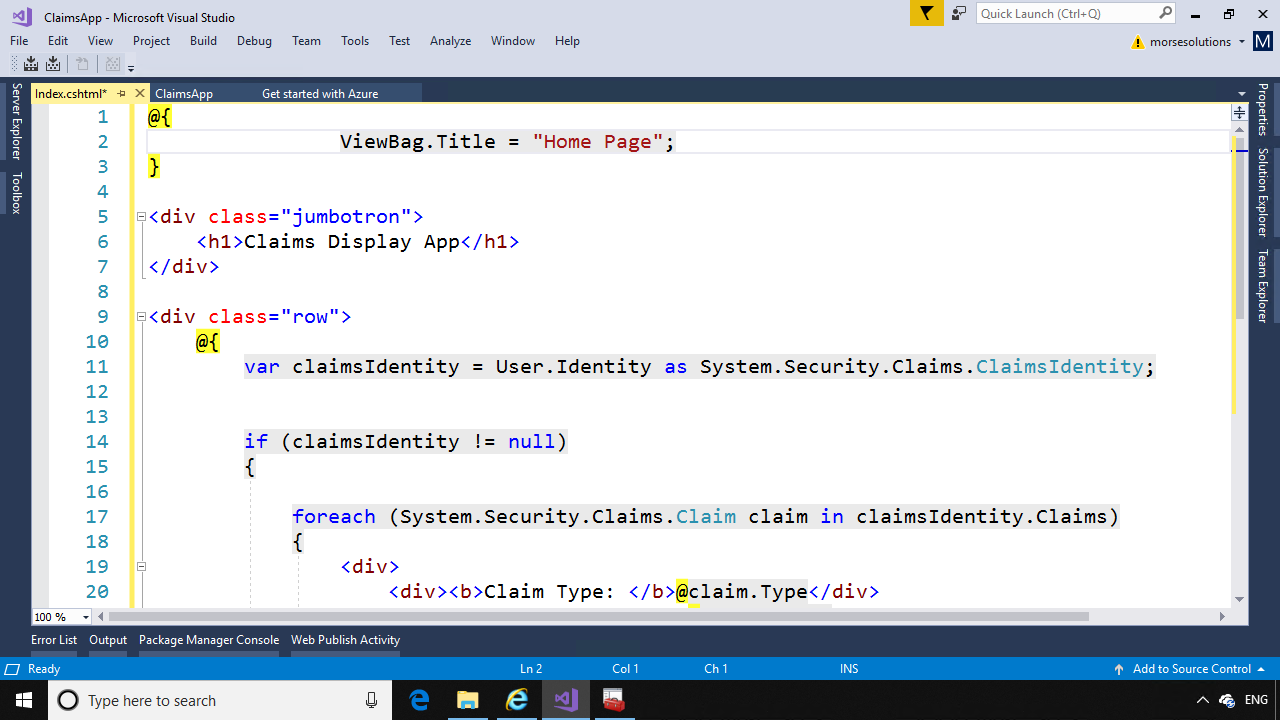
Now open Solution Explorer again, and double click on “Index.cshtml”, under the Views->Home folder.
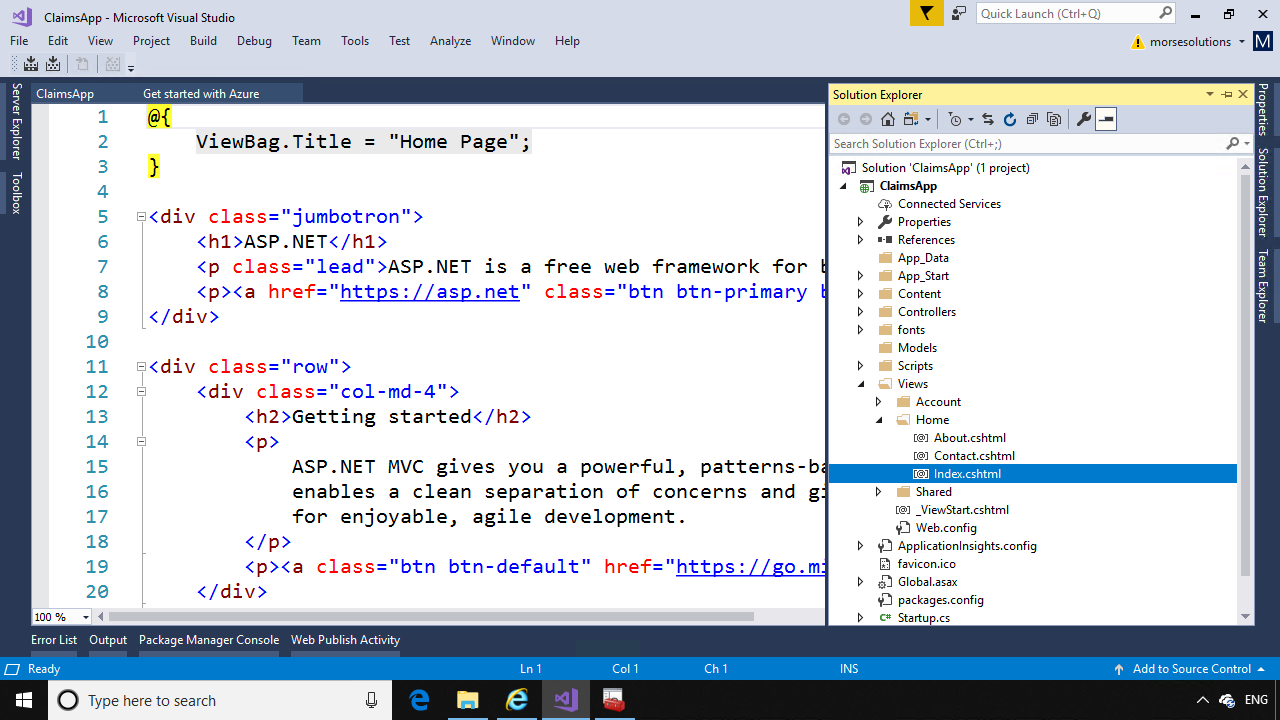
Remove all the text in the Index.cshtml file and replace with the following code:
@{

ViewBag.Title = "Home Page";

}
<div class=”jumbotron”>
<h1>Claims Display App</h1>
</div>
<div class=”row”>
@{
var claimsIdentity = User.Identity as System.Security.Claims.ClaimsIdentity;
if (claimsIdentity != null)
{
foreach (System.Security.Claims.Claim claim in claimsIdentity.Claims)
{
<div>
<div><b>Claim Type: </b>@claim.Type</div>
<div><b>Claim Value: </b>@claim.Value</div>
<div>——————————————-</div>
</div>
}
}
else
{
<b>Claims are null.</b>
}
}
</div>
This code will display all the claims that are returned from ADFS after authentication.
Next, in Solution Explorer, right click on the project name and in the menu that opens, click “Properties”.
Click the “Web” menu item on the left, and copy the “Project URL” at the bottom. This will be the reply URL that ADFS will redirect to.

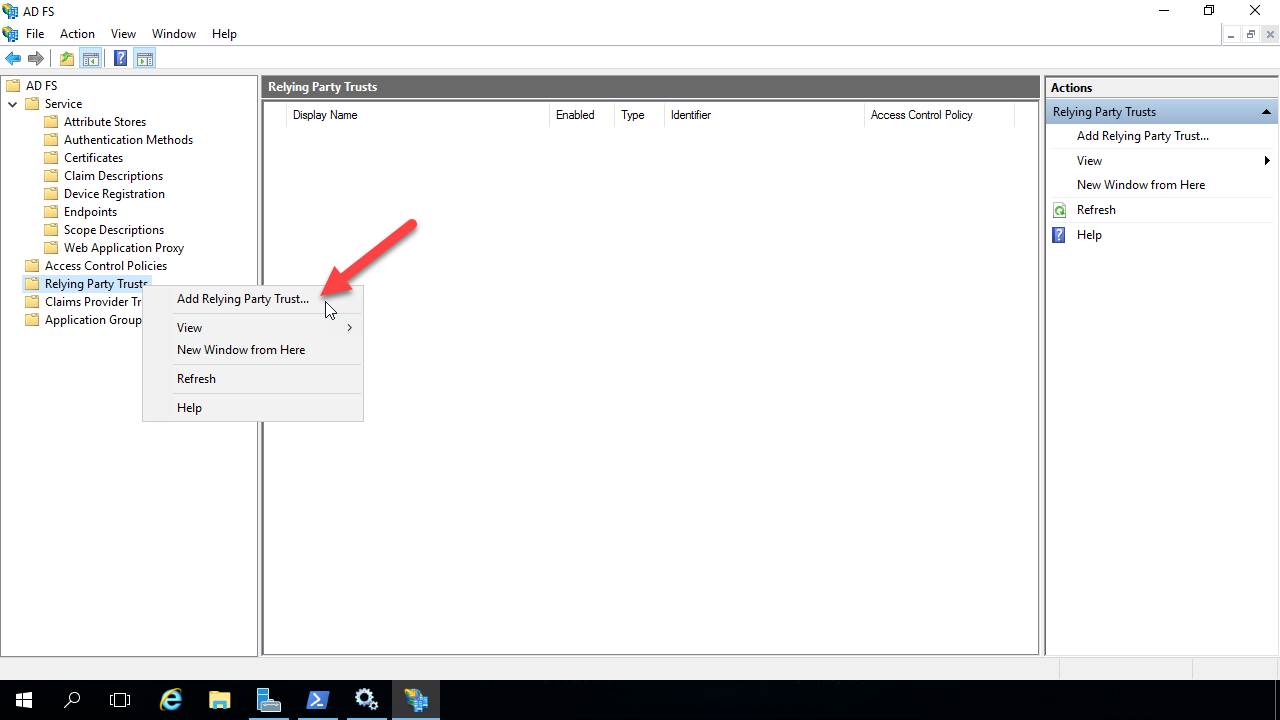
Now switch over to the VM that’s running ADFS, and open up ADFS Manager. Expand the nodes under ADFS in the left tree menu, and right click on the “Relying Party Trusts” node. In the menu that opens, click “Add Relying Party Trust”
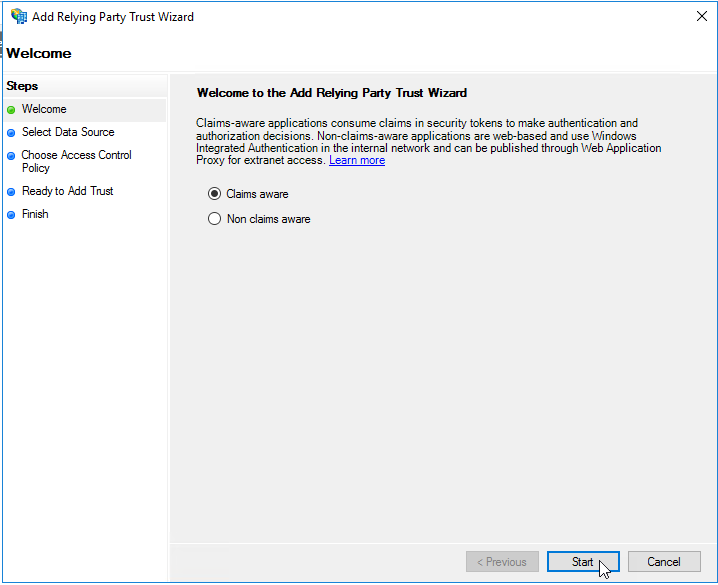
In the Wizard that opens, select the “Claims Aware” radio button and click “Next”.
On the next page of the wizard, select “Enter data about the relying party manually” and click “Next”.

Give the Replying Party Trust a display name – note this is only used by ADFS, but will appear on error pages also. Click “Next”.

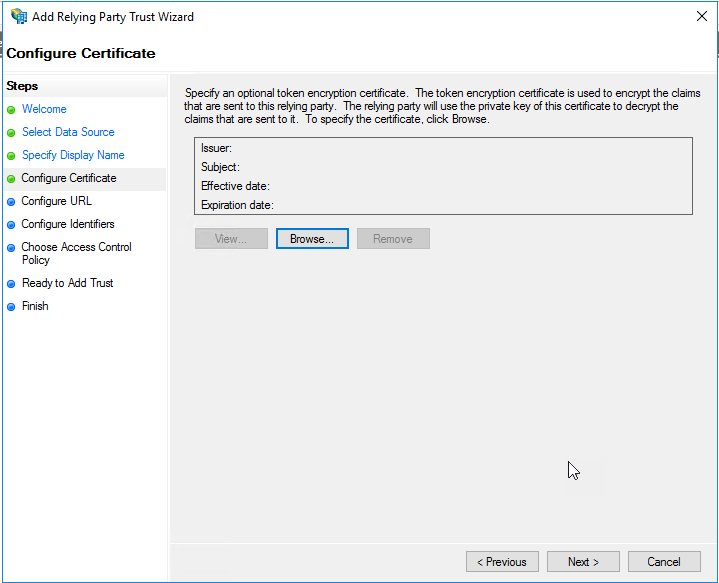
Click “Next” on the “Configure Certificate” page.
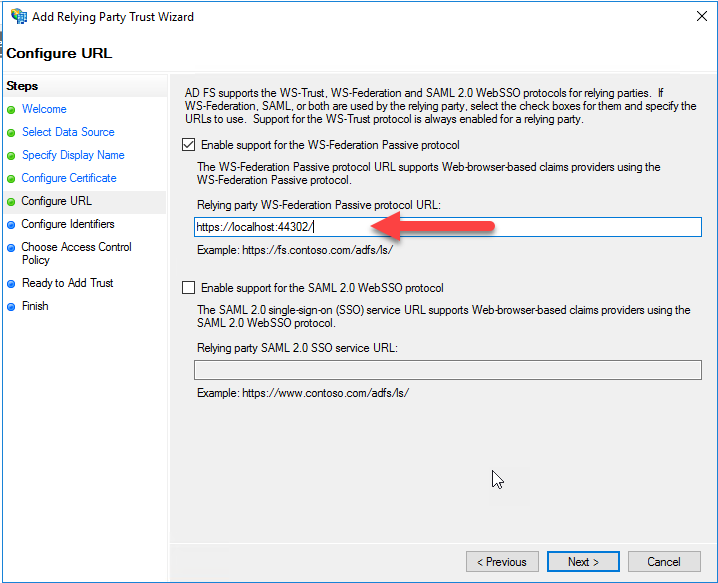
On the “Configure URL” page of the wizard, select “Enable support for the WS-Federation Passive protocol”. In the text box that gets enabled, paste in the home page URL of your relying party application that you copied from the properties page in Visual Studio. Ensure there is a trailing forward slash “/” in the URL. Click Next.
On the “Configure Identifiers” page of the wizard, enter the unique identifier for the relying party application in the text box and click “Add”. This is the value of the “ida:Wtrealm” key in the appsettings of your web.config file. In the example application shown earlier, this value is “https://uniqueappid.com”.
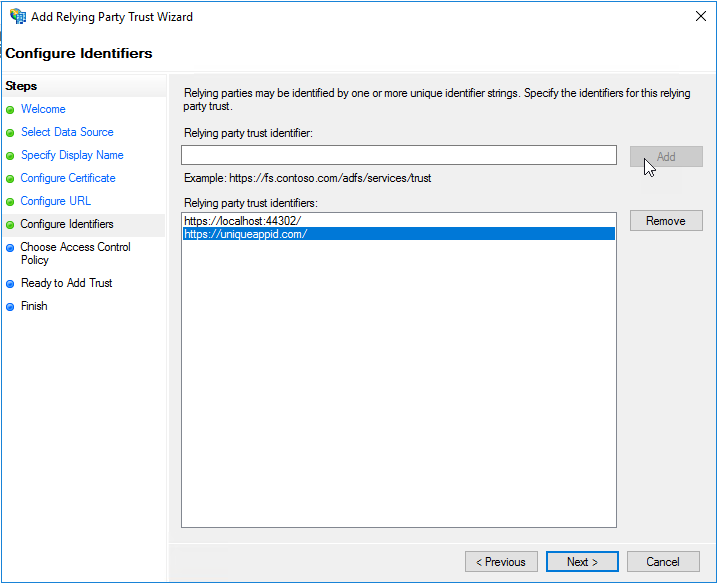
Next, highlight the default identifier that was added from the previous screen. In the example this is “https://localhost:44302/”. Then click the “Remove” button, so only the proper unique identifier is left in the “Relying party trust identifiers” list.
Click Next.

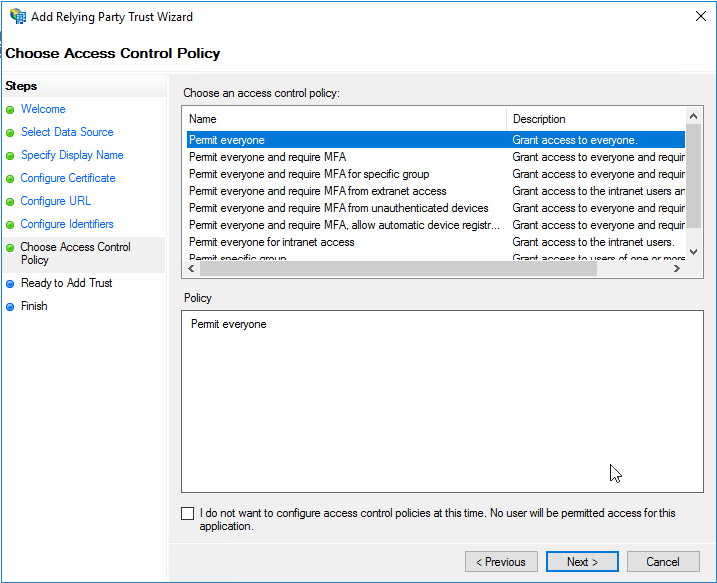
On the “Choose Access Control Policy” page of the wizard, leave the default “Permit Everyone” selection and click “Next”.
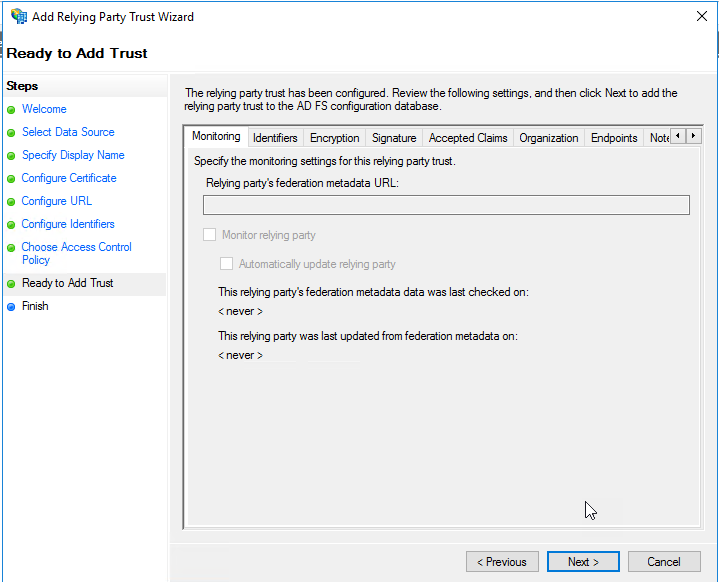
On the “Ready to Add Trust” page, you can review the values on the “Identifiers” and “Endpoints” tabs, and click “Next”.
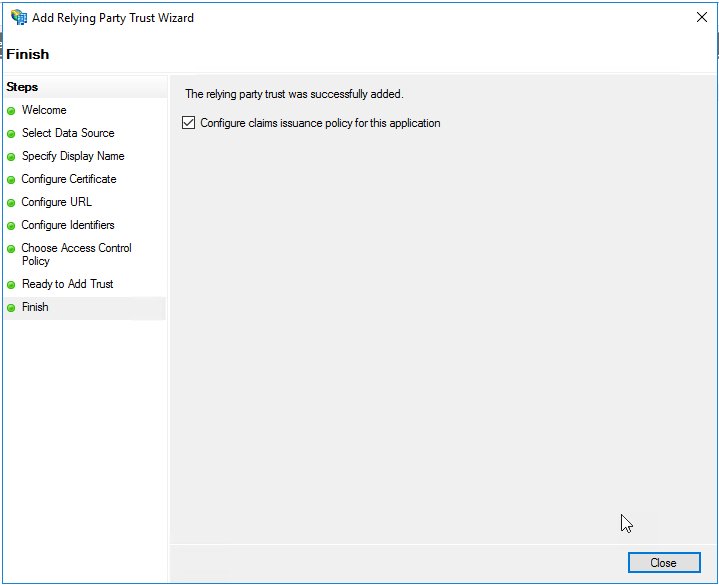
On the “Finish” page of the wizard, leave the checkbox selected and click “Close”.
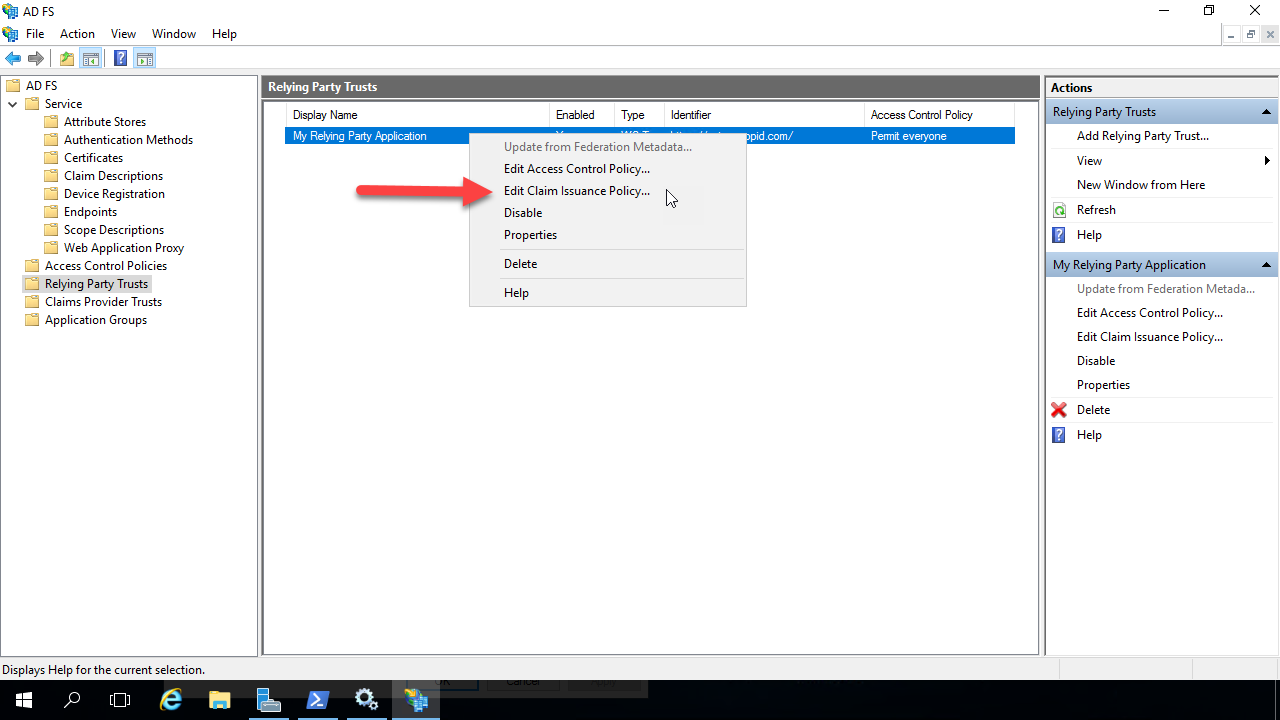
The Relying Party Trust is created and visible. Right click on it and select “Edit Claim Issuance Policy”. This is where you will configure the claims that will be returned to the relying party after the user is authenticated by ADFS.
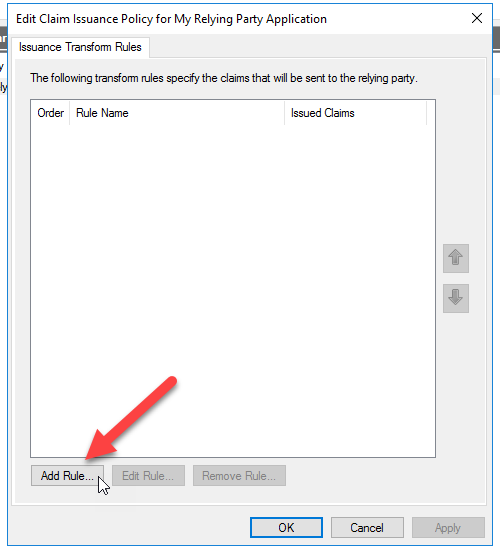
On the dialog that opens, click “Add Rule” at the bottom.
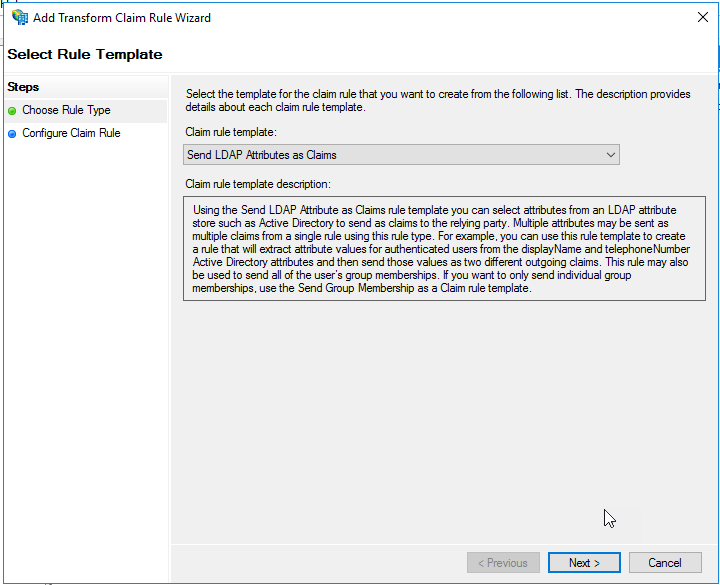
Select “Send LDAP Attributes as Claims” in the drop down for the Claim Rule Template. Click Next.
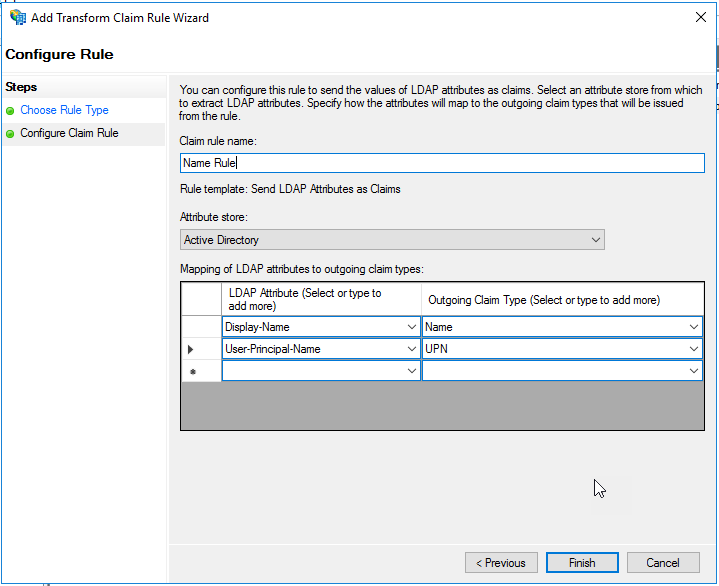
On the “Configure Claim Rule” page, give the rule a name at the top.
In the “Attribute store” drop down list, select “Active Directory”.
Select the LDAP attributes “Display-Name” and “User-Principal-Name”, and assign them values in the right side drop down lists of “Name” and “UPN”, respectively. Ensure the screen looks like the image below and click “Finish”.
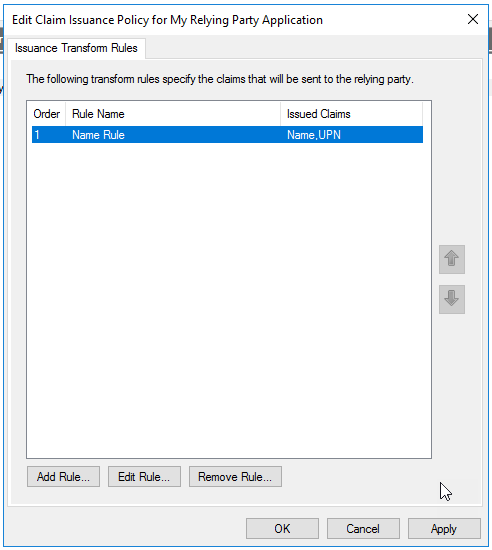
On the “Issuance Transform Rules” page, click “OK” to finish creating the claims rule.
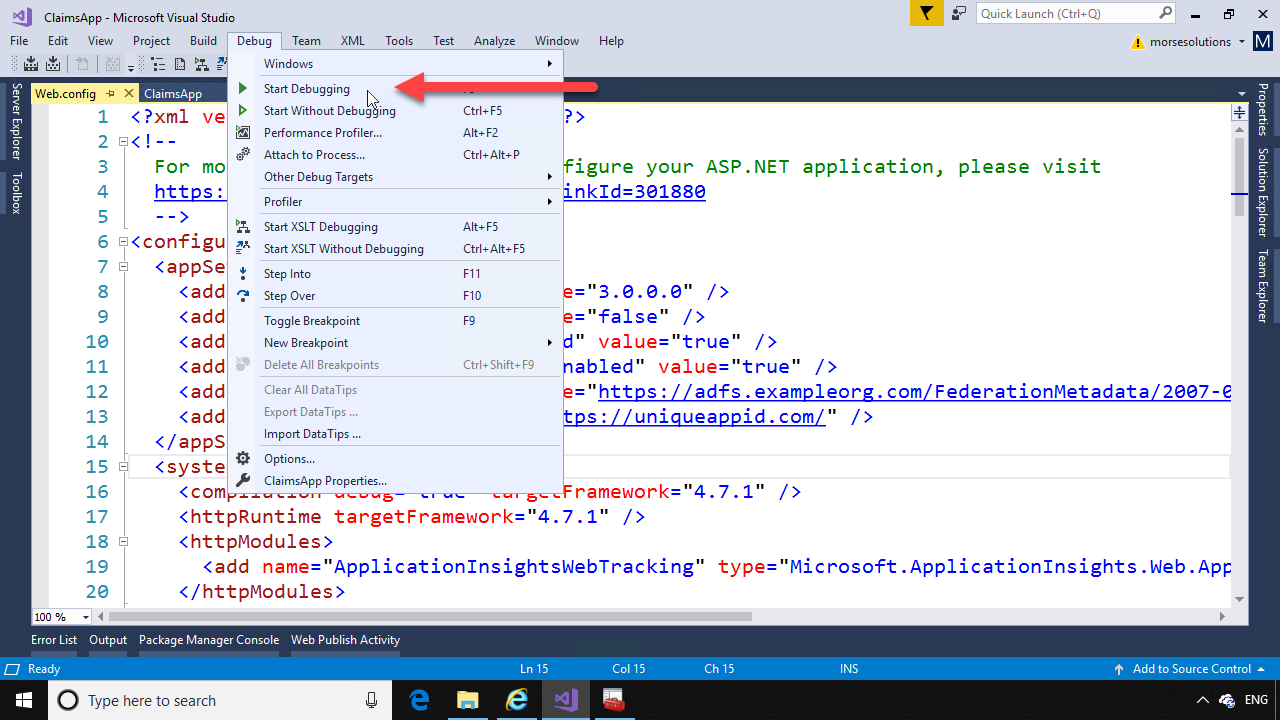
Back on the computer running Visual Studio, run the application by hitting F5 or “Start Debugging” from the Debug menu.
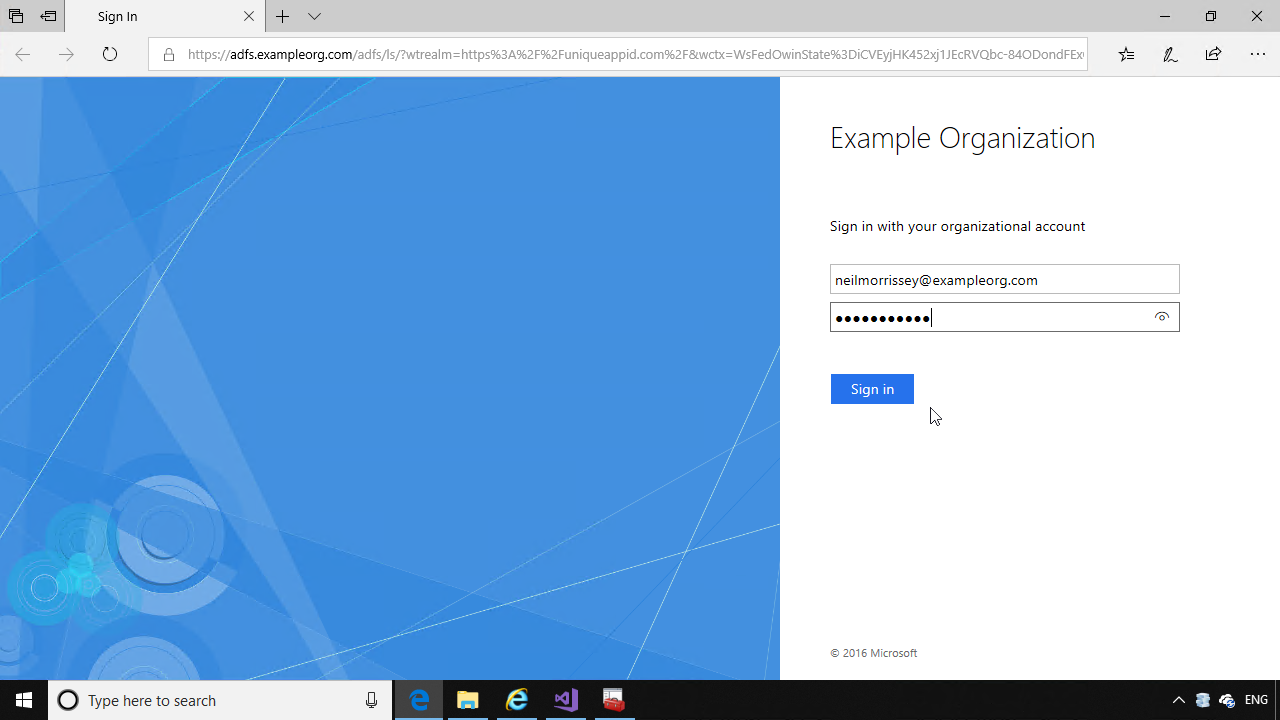
The application will open in the browser, and redirect to the ADFS login page. Enter the credentials of a user in your Active Directory.
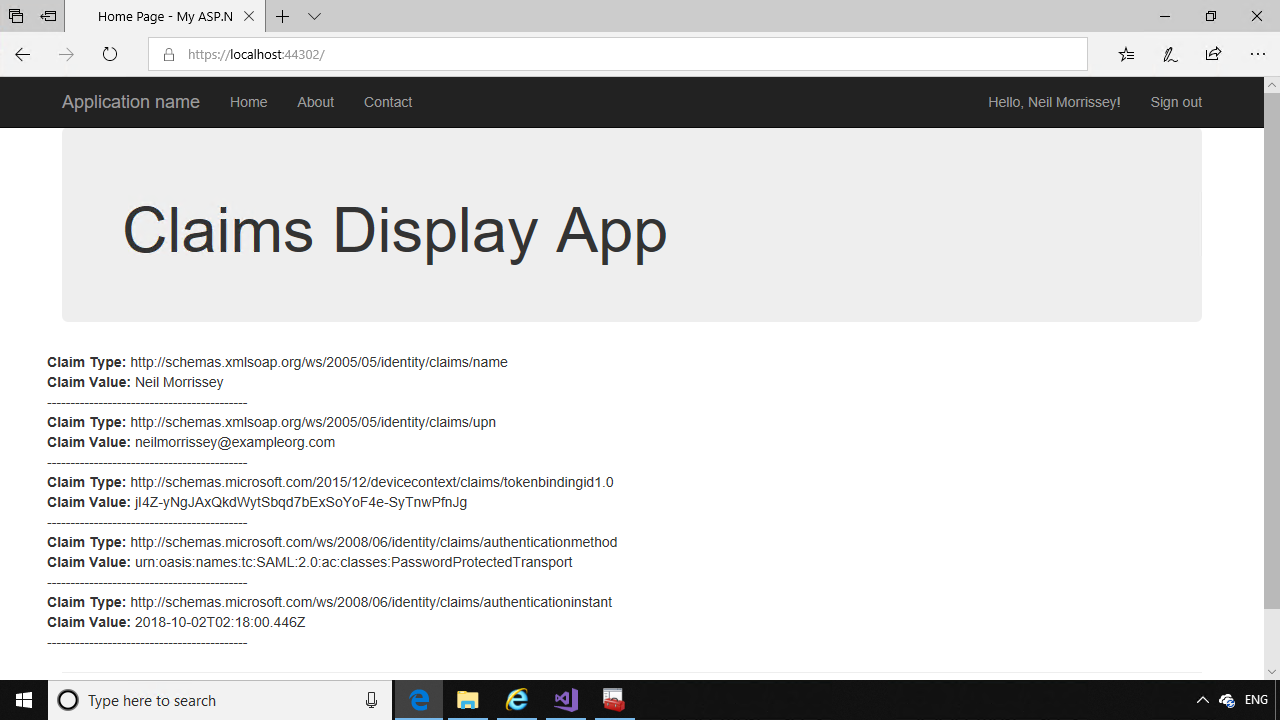
ADFS will redirect the browser back to the home page of the relying party application, where the code will display the claims you configured in ADFS.
Hello Neil!
Your videos and your blog contains really great material, handing you that!
Unfortubately I do struggle alot to get this claims app to work for me.
Im using HyperV for my lab, Here I have a DC, ADFS, stand-aloneCS, and a subordinate CS, and a Win10(administrative client) all domainjoined to my domain something.local.
I installed MS Visual Studio and iis on my Win10, (fqdn mydesktop.something.local). I strictly followed your guide to create this claims app and publish it with iis.
By copying all the files from the Visual studio folder where it saves after the app had been debugged, to c:\inetpub\wwwroot\claimsapp,
So.. Under sites in iis manager I have claimsapp containing all the content.
All certificates are configured and in their place, bindings, permissions etc. I can connect to federationMetadata through browser, the sign in page on adfs.
But, when I browse https://claimsapp.something.local/claimsapp
I get:
“HTTP Error 500.19 – Internal Server Error”
Configuration Error: This configuration section cannot be used at this path. This happens when the secton is locked at a parent level. Locking is either by default (overrideModeDefault=”Deny” or the legacy allowOverride=”False”.
Config File: \\?\C:\inetpub\wwwroot\claimsapp\web.config
Requested URL: https://claimsapp.something.local:443/claimsapp/
Physical Path: “C:\inetpub\wwwroot\claimsapp\claimsapp\”
(I dont get why browser dont detect that the physical path is C:\inetpub\wwwroot\claimsapp\)
And then the Config Source:
79:
80: (this line is highlighted in the color red!)
81:
Hi Thomas,
Sorry to hear you are having issues.
Please check what version of ASP.NET your claimsapp is targeting – there is a node in web.config under system.web: “httpRuntime targetFramework=”4.7.1” (or whatever framework version you’ve compiled the claimsapp for). Then in Server Manager on the Windows Server hosting your IIS, under the Manage menu -> Add Roles and Features, check that “Application Development” under “Web Server” has ASP.NET installed. Check the appropriate versions and complete the wizard. If you’re using a newer version (in web.config) than the ASP.NET versions available, then you need to download the latest ASP.NET runtime from Microsoft and install on the server.
Another way to verify this is the issue is to take ADFS out of the picture, and deploy a plain ASP.NET app (from the default template in Visual Studio) to IIS. I would also suggest creating Publish files in Visual Studio, rather than using the contents of the debug folder (if I’m understanding your current process correctly). Right click on the project in Visual Studio and select Publish -> create a new Publish profile to publish to a folder. That will ensure you have all the right files to deploy to IIS.
Please let me know if this helps solve the issue.